
-
add to favourites


Anti-virus + Windows: An unbeatable combination against encryption ransomware
Friday, October 21, 2016
Weâve already written quite a bit about encryption ransomware programs (the âEncrypt everythingâ category's issues are devoted to them). One measure that must be taken to keep data from being corrupted by encryption ransomware is installing an anti-virusâa necessary measure, but an insufficient one. Only fake anti-viruses guarantee 100% protection against encryption ransomware (this topic was discussed in the issue âFalse fears lead to wrong actionsâ).
This issue wonât touch upon obvious protection measures like installing updates, using complex passwords, and the need to work with limited rights. Today, letâs discuss how you can use the features of your Windows operating system together with your anti-virus to protect your data from encryption threats.
Perform backups
Data can be backed up in many ways. But simply copying your files to another disk or via the network is not recommended since encoders can encrypt network folders. Of course, you can store your data online using Google Drive, Dropbox, and Flickr, but you need to remember that this method does not guarantee that files encrypted by the Trojan will not be deleted by their older versions. Therefore, the selected backup system must support the ability to store file versions, as has been implemented, for example, in the Data Loss Prevention feature of Dr.Web Security Space.

To configure Data Loss Prevention, click on the icon
 in the system menu, and then in the newly appeared window, click on
  and select "Tools". In the next window, select Data Loss Prevention and enable the option to automatically create copies.
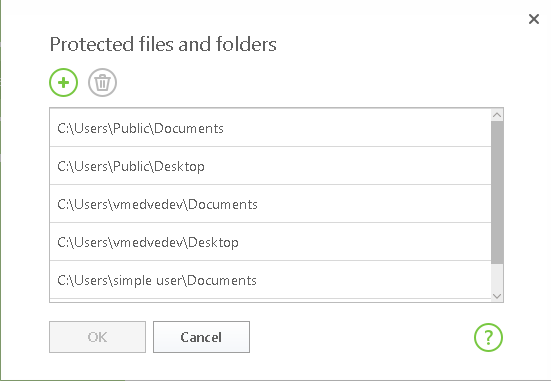
After this, specify the files and folders to be copied.
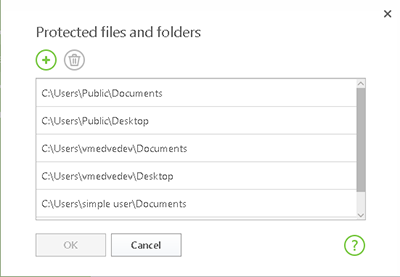
To add files and folders, click on the icon
 , and specify the objects to be protected.
Select âCopy filesâ¦â to specify the frequency of backups and the storage location.
Enable the Windowâs âSystem protectionâ feature
As a rule, this feature is disabled by default.
When the Windows system protection is enabled, the copies of critical system files and settings are createdâfor example, before installing any drivers, as well as on a regular schedule.
Important! You can also create a restore point manually.
To enable âSystem protectionâ, right-click on the icon âMy computerâ and select âPropertiesâ. Next, click on âAdvanced optionsâ for the system and go to the âSystem protectionâ tab.
The same tab can be accessed by clicking on âStartâ → âControl Panelâ → âSystemâ → âSystem protectionâ.
Advanced users do this in the command prompt or in the âRunâ window (WIN + R) by entering rundll32.exe shell32.dll,Control_RunDLL sysdm.cpl,,4
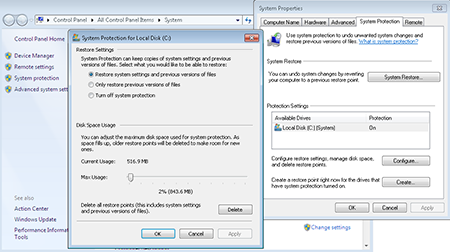
If at least one local drive is enabled (âOnâ) in the list of logical drives, âSystem protectionâ is already activated and restore points are being created.
If "System protectionâ is disabled, select one of the local drives and click on âConfigureâ. With this, you can select the section with the maximum amount of free space.
In the newly appeared window, select âRestore system settings and previous files versionsâ and use the slider âMaximum useâ; set the maximum amount of disk space that the system will use to create restore points.
Important! When you create new restore points, the old ones will be deleted.
Double click on âOKâ.
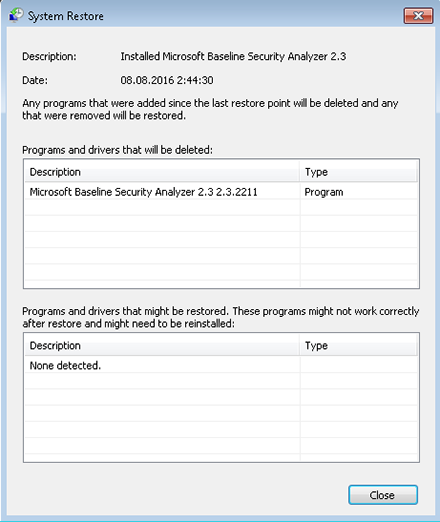
Beginning with Windows 7, you can view a list of programs and drivers affected by the rollback for each recovery point. It is obvious that after a system restore, such programs may not work correctly. Thus, you can know beforehand which programs you may need to reinstall after the restore.
To create a restore point manually, enable âSystem protectionâ.
Go back to the âSystem protectionâ tab and click on âCreateâ. In the newly appeared window, enter a name for the restore point and click on âCreateâ. Wait for the message that indicates the operation was successful, and then click on âCloseâ.
To restore files from backups, you must:
- in the menu âStart-Searchâ, enter âRestoreâ and click on âSystem Restoreâ;
- in the menu âStart-Search or in the window âRun â (WIN + R), enter rstrui and then click on âEnterâ;
- in the Control PanelââBackup/Restoreâ click on âRestore system settings or computerâ, and then click on âSystem Restoreâ;
- Open âControl Panelâ-âSystemâ-âSystem protectionâ , and then click on âSystem Restoreâ;
In addition, you can start âSystem Restoreâ from the Windows RE environment
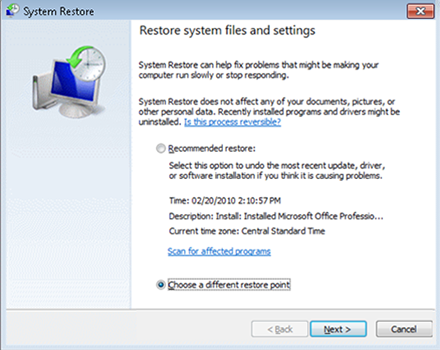
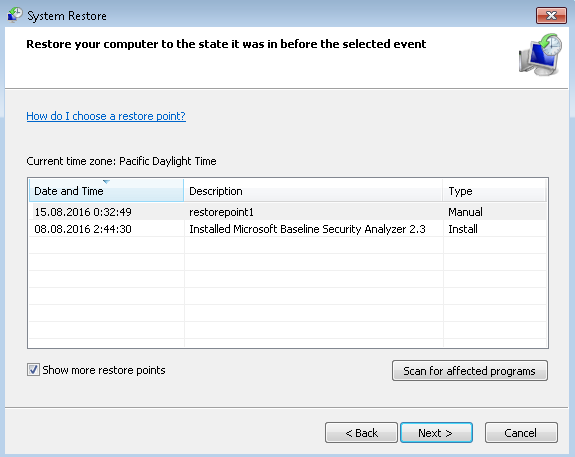
In any case, you will end up at the âSystem Restoreâ window and then must select a checkpoint. You can select any restore point, not just the last one.
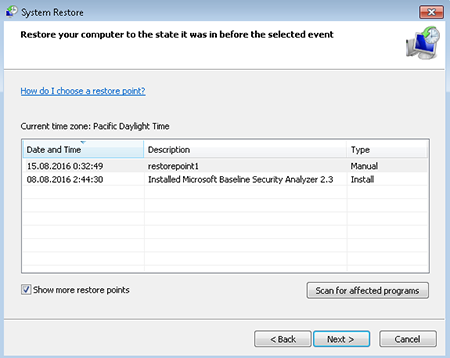
If your operating system is able to create a backup of the system image, you can also select it as a restore point. To see this point, select âShow more restore pointsâ.
Also, in this window you can see which programs will be affected when files are restored from the backup. To do this, click on âSearch the affected programsâ.
To start the restore, click on âFinishâ.
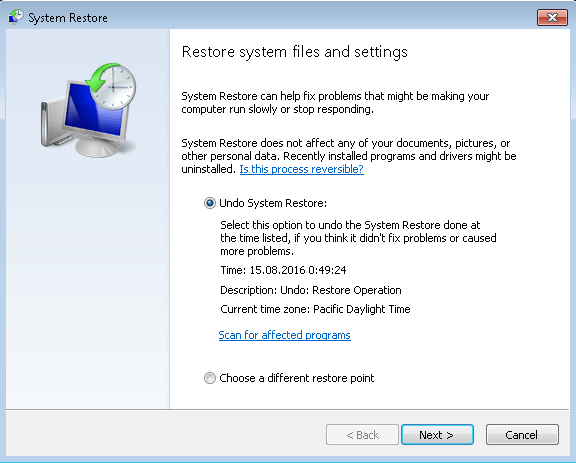
Important! If you accidentally selected the wrong point or restoration has not brought the desired results, you can cancel the last system restore. This is possible because before the restoration, Windows 7 also creates the checkpoint. To cancel the restoration, select âUndo system restoreâ.

The operating system has more features for protecting data other than the recovery points. For example, when you visit the properties of the hosts fileâa favourite of cybercriminals, you can see the following:
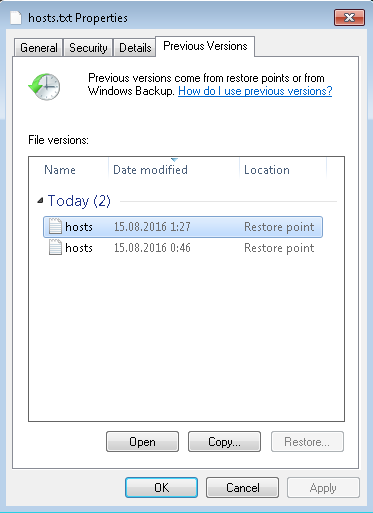
The ability to restore previous versions of files was first introduced in Windows Vista. However, since the features available in the previous versions were not removed, the file versions are consequently saved not only by using the volume shadow copy service, but also when you are using Windows backup. In the fileâs properties, in the tab âPrevious versionsâ, specify the location: âRestore pointâ or âBackupâ.
Read about how to use Windows features to save versions of your files in upcoming issues of the Anti-virus Times.


The Anti-virus Times recommends
Unfortunately, users know little about the capabilities of modern OSs. They have neither the patience nor the time to read the documentation. But, this situation must and can be corrected: because you paid good money for your system!
![[Twitter]](http://st.drweb.com/static/new-www/social/no_radius/twitter.png "Shared 16 times")
Tell us what you think
To leave a comment, you need to log in under your Doctor Web site account. If you don't have an account yet, you can create one.
Comments
vasvet
08:17:22 2018-07-01